Quick Answer
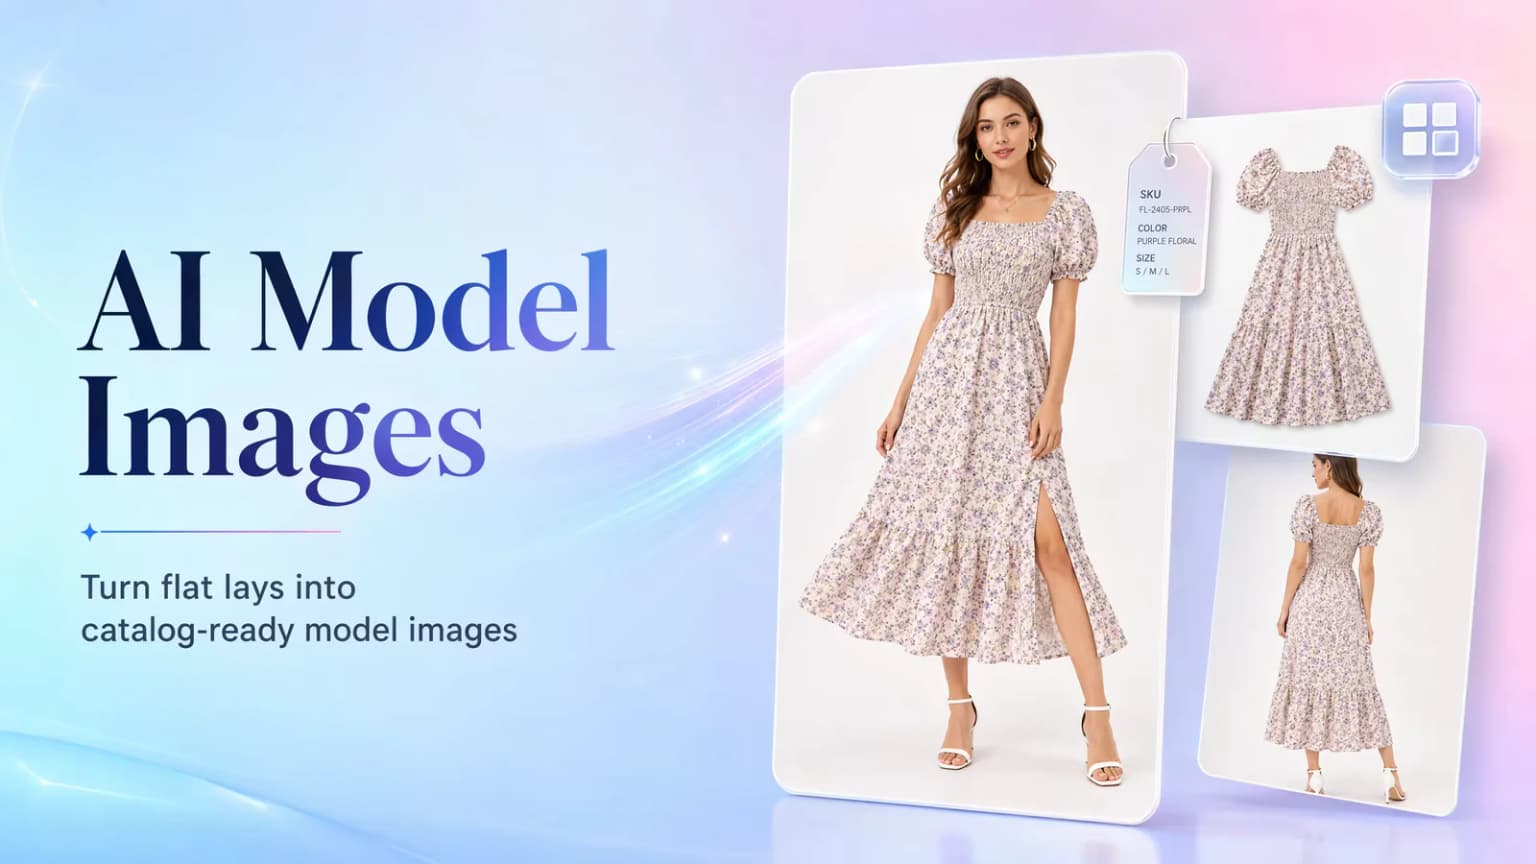
An AI fashion model generator helps ecommerce teams turn a flat-lay clothing photo into a static on-model product image. In Hilight, open Clothing Try-on, select the correct garment structure, upload the clothing image, and use either a built-in model or a suitable reference photo. Generate a small test first, then check the garment's color, pattern, logo, shape, edges, and model pose before using the result.
This tutorial focuses on still images for product listings and ecommerce creative production. If you need walking, turning, fabric movement, camera direction, or a short try-on clip, use Hilight's virtual try-on video workflow instead.
The most dangerous AI fashion image is not the obviously broken one. It is the polished image that quietly changes the product: a logo shifts, a hem becomes shorter, a knit starts to look like satin, or a matching set turns into two slightly different colors.
For an ecommerce team, realism is only half the job. The image also has to remain faithful to the garment it is supposed to sell. That changes how an AI fashion model generator should be used: not as a shortcut to endless attractive variations, but as a controlled workflow that begins with a clear flat-lay image and ends with a product-level review.
This tutorial shows how to turn clothing photos into static on-model images in Hilight, choose the right inputs, and check the result before it reaches a product page, catalog, or campaign layout.
What Does an AI Fashion Model Generator Create?
For this workflow, the output is a static image of a garment worn by a model. It can help a team:
- add human context to a flat-lay product image;
- add an on-model option to an existing product-image set;
- compare several model directions for one garment;
- create a consistent presentation style across a small product range;
- prepare source images for listings, layouts, and later creative work.
It does not measure a shopper's body, recommend a size, or predict physical fit. It should not replace the source product photos used to document the actual garment. Keep the original garment images, detail photos, and size information available wherever product accuracy matters.
The distinction from a try-on video is simple:
AI virtual try-on is a broad category, and ecommerce teams may use virtual try on clothes to describe both still-image and video workflows. This tutorial covers the static path: AI virtual try-on for fashion products that turns garment photos into reviewable on-model catalog images. When motion is the goal, the separate virtual try-on video workflow is the better fit.
Choose the Right Input Path for the Garment
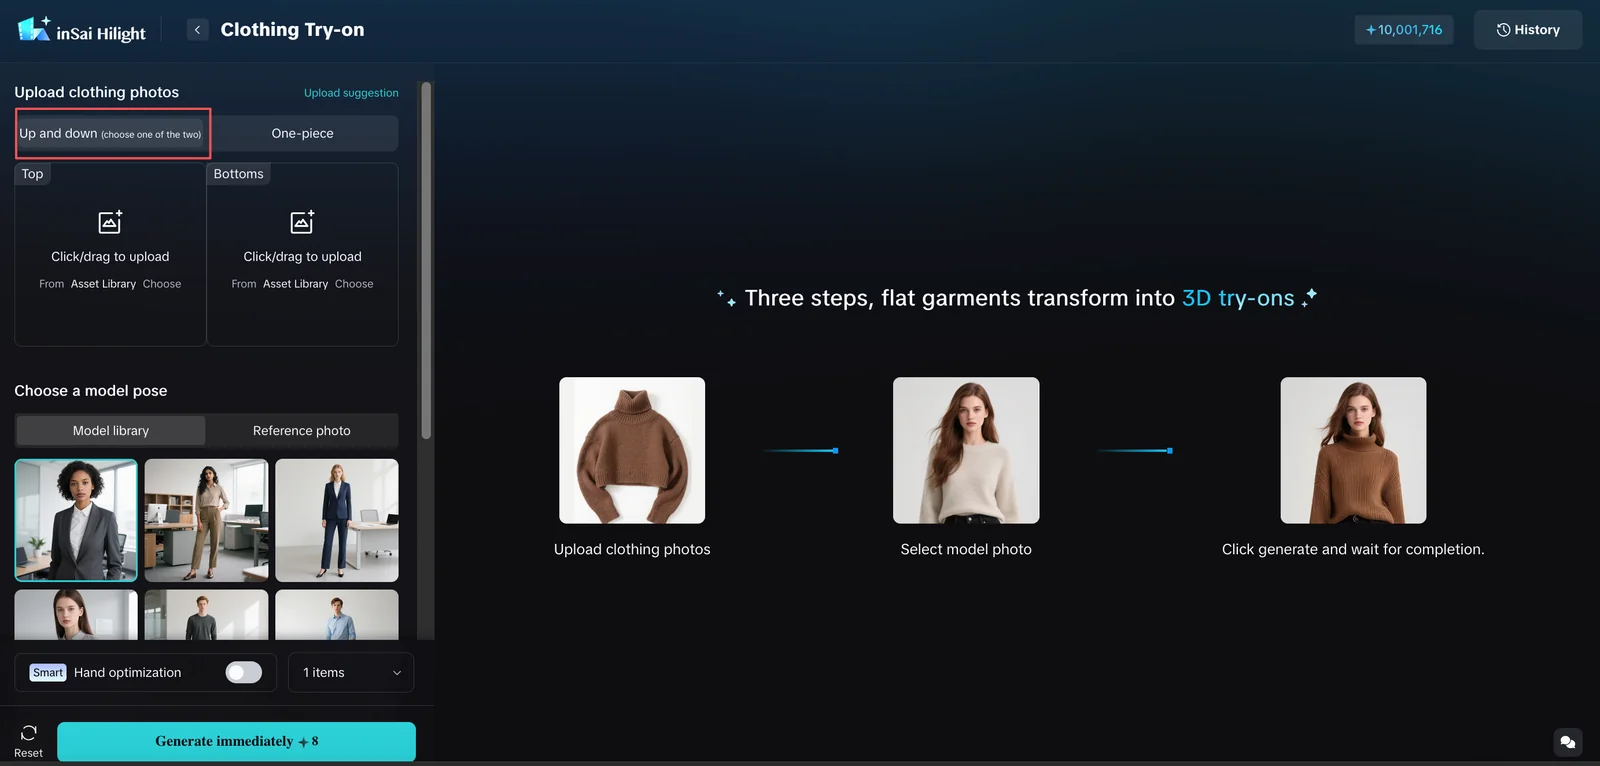
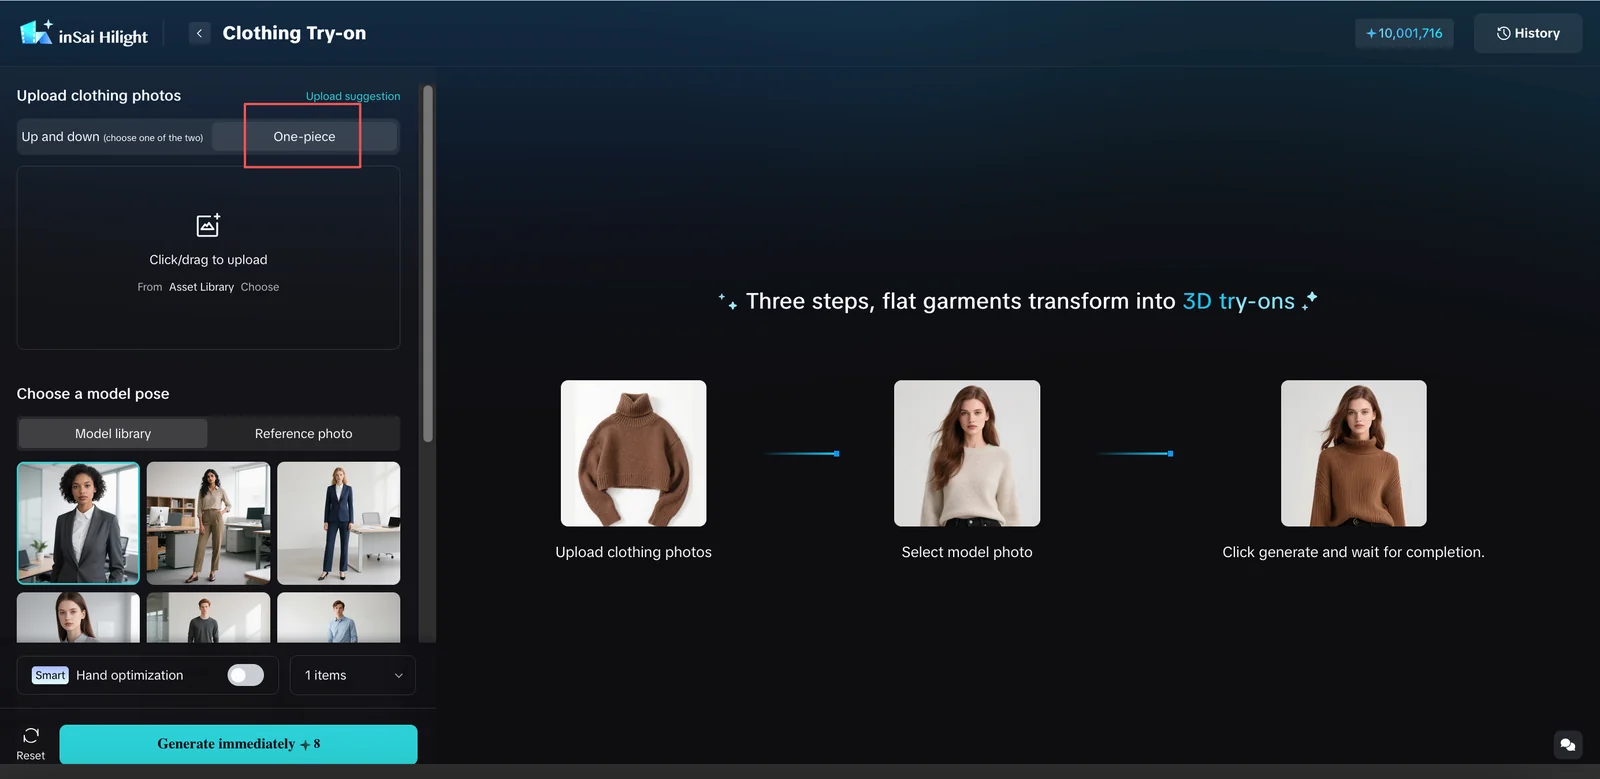
Before choosing a model, identify the structure of the garment. The correct input path gives the system a clearer instruction about what should be replaced and what should remain.
Do not upload a dress as a top. Do not place a full outfit image in a single top or bottom field. The selected input mode tells Hilight which clothing structure it should preserve.
If the product is sold as a coordinated set, use separate, clean images for the top and bottom whenever possible. This gives each item a clearer outline than one combined flat-lay photo.
Prepare the Clothing and Model Assets
AI can only preserve details that the source image shows clearly. A few minutes spent preparing the garment and model images can prevent many avoidable generation errors.
Clothing image checklist
Use a garment photo with:
- the complete product inside the frame;
- a clear front view;
- a simple background;
- visible sleeves, neckline, waist, hem, and outer edges;
- accurate color and enough resolution to inspect texture;
- readable logos or printed details where possible;
- no model or unrelated object covering the garment;
- no severe folds, rolled corners, or stacked clothing.
A clean flat-lay or isolated product image is usually the safest first input. Styled photos can work as visual references, but props and overlapping objects make the garment boundary less clear.
Built-in model or your own reference photo?
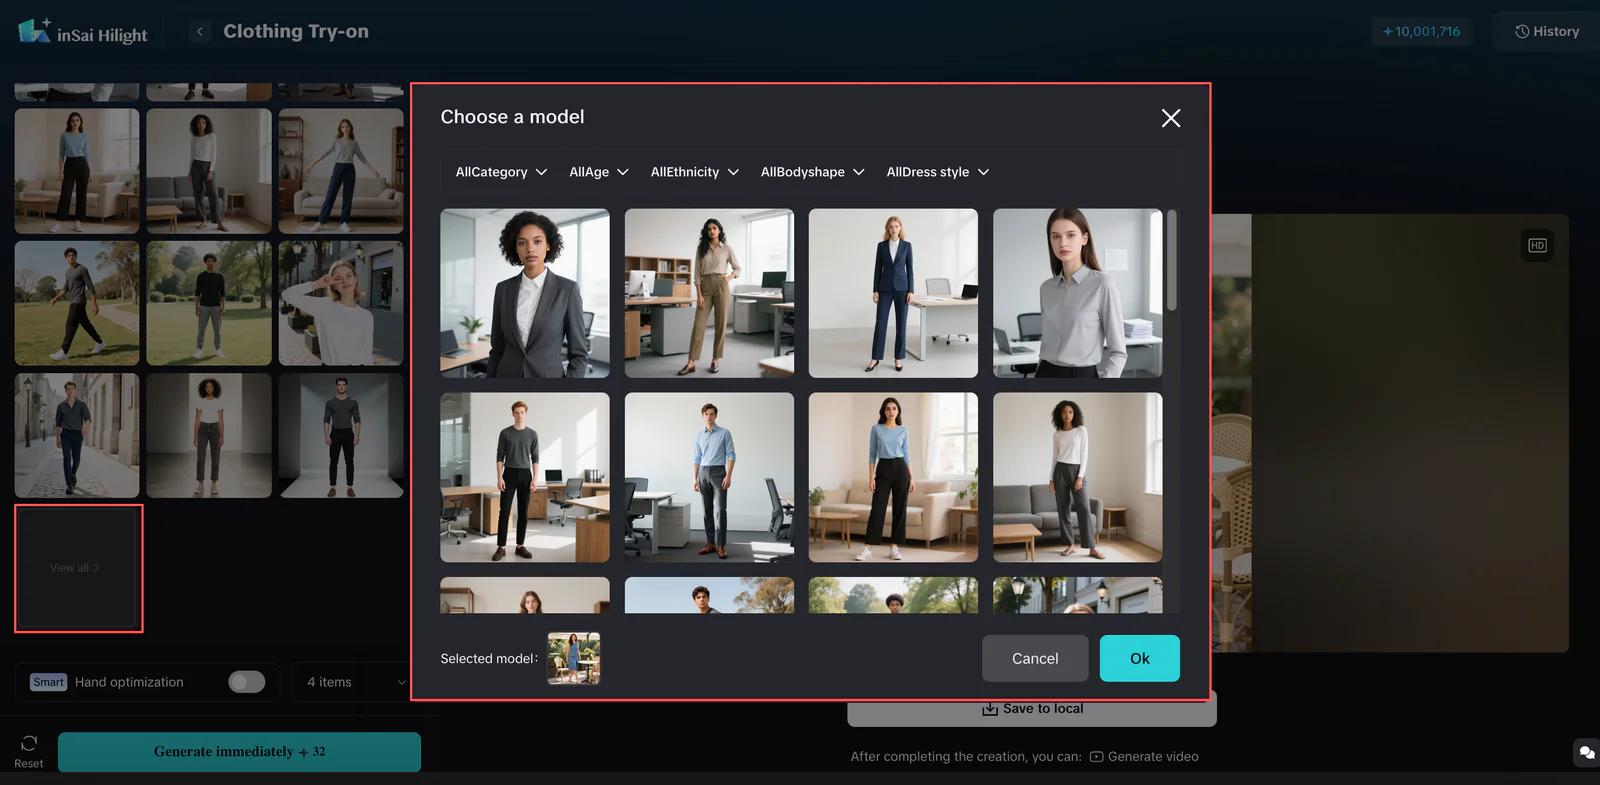
Use Hilight's built-in model library when you want to test quickly or do not have a model photo. It is also useful for comparing which pose presents the product best.
Use a reference photo when you need a specific model appearance, pose, or brand direction. Choose one person in a natural standing pose with a simple background and a clearly visible body.
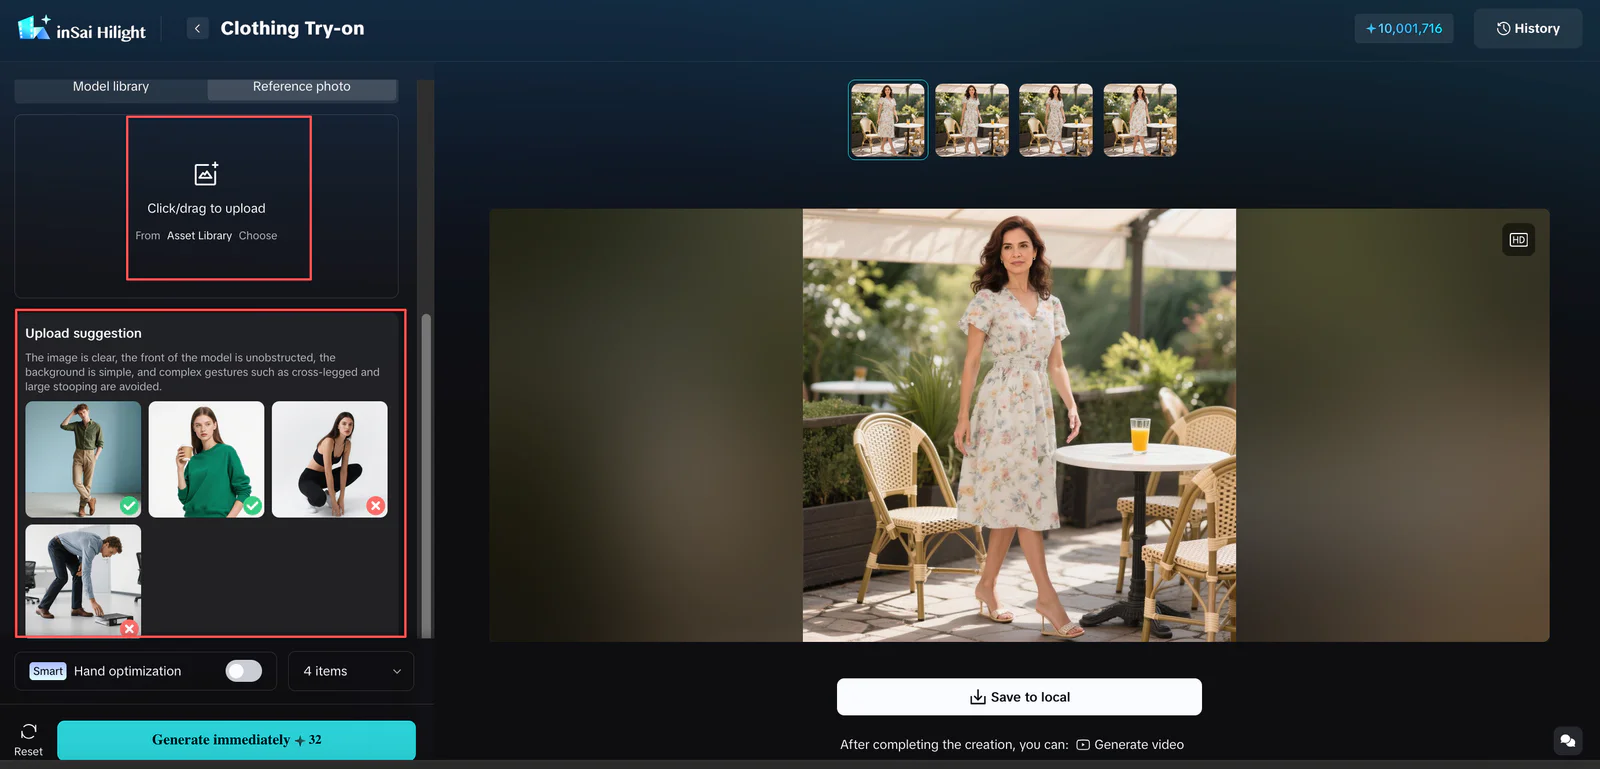
The body framing must match the garment:
- a waist-up model photo can work for a top but not for full-length trousers;
- a full-body model is safer for dresses and coordinated outfits;
- hands, hair, bags, and props should not cover important product areas;
- a model already wearing a similar garment category is usually easier to work with.
For example, a long-sleeve shirt is better matched with a model wearing long sleeves than with a model wearing a sleeveless top. A mid-length dress is better matched with a pose that clearly shows the torso, waist, and hem.
How to Create an On-Model Product Image in Hilight
Step 1: Open Clothing Try-on
Open AI Studio, go to Image Tools, and choose Clothing Try-on.
Step 2: Select the garment structure
Choose the tops-and-bottoms mode or the one-piece mode. Base this choice on the actual construction of the product, not on the layout of the source photo.
Step 3: Upload the clothing image
Place each garment in the corresponding upload area. Check the preview before continuing. If the product is cropped, folded, or assigned to the wrong field, correct it before generating.
Step 4: Select a model
Choose a model from the library or upload a reference photo. Check whether the pose can show the complete product and whether the original clothing is reasonably close to the target garment category.
Step 5: Set the output
Choose the available image ratio and the number of results. Start with a small test set. At this stage, you are testing whether the garment input and model choice are compatible, not producing every final variation.
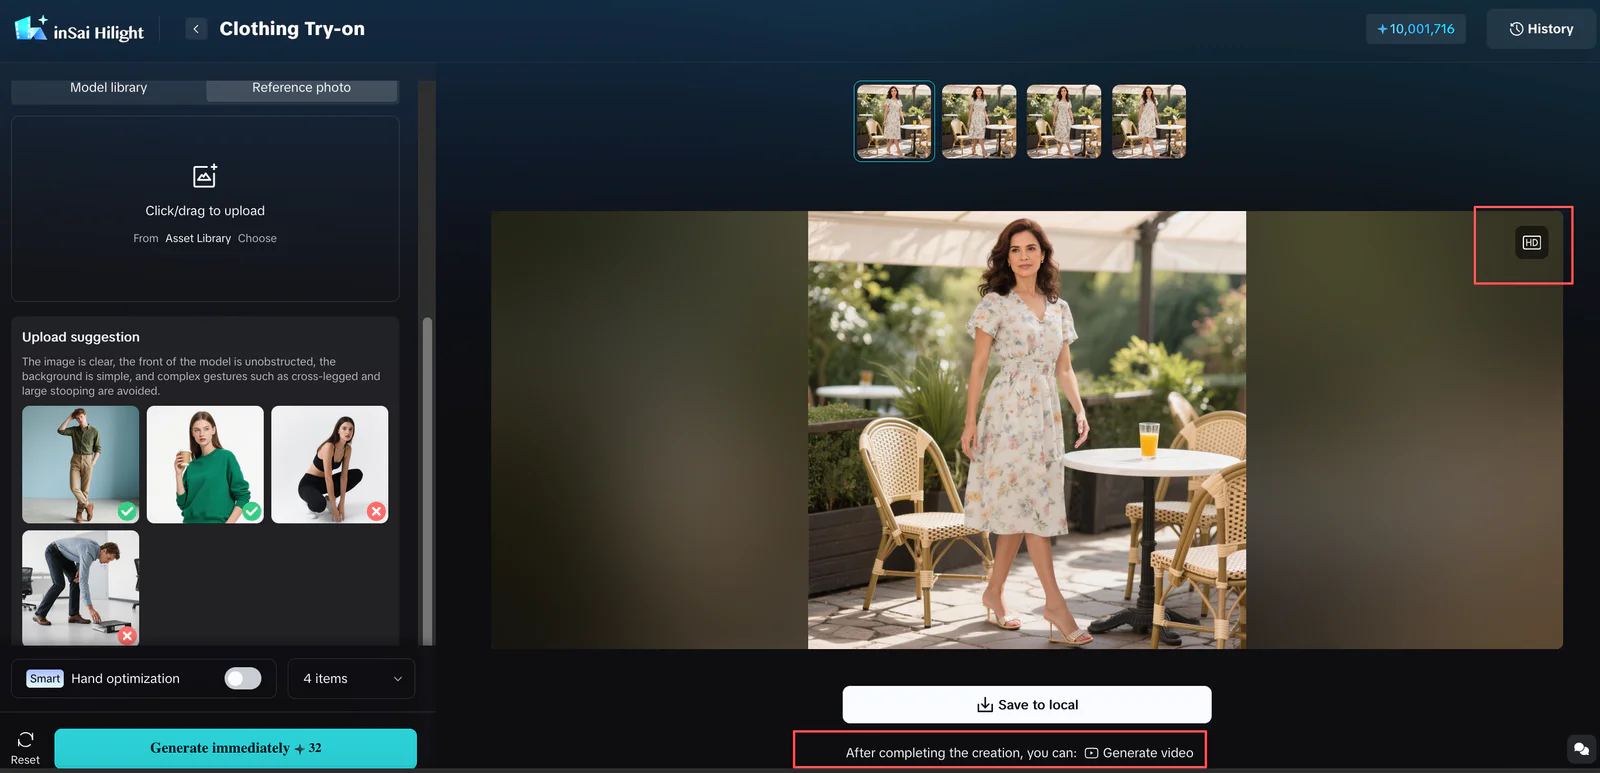
Step 6: Generate and select a candidate
Compare the generated images and choose the candidate that preserves the product most accurately. A visually striking model image is not useful if it changes the garment.
Download the candidate for a full-size review. Use History when you need to compare it with earlier attempts.
Product Accuracy Checklist for AI Model Images
A result can look convincing at first glance and still fail as product content. Compare every candidate with the source garment before it enters a listing or campaign.
1. Garment identity
Confirm that the generated item is still the same product category and basic silhouette. Check the neckline, sleeves, waist construction, trouser legs, dress length, and hem.
2. Color and pattern
Compare the result with the source photo. Look for shifted colors, missing stripes, altered checks, invented gradients, or repeated pattern errors.
3. Logo and printed text
Zoom in on brand marks, labels, slogans, and graphic prints. AI-generated images can distort small letters or rebuild logos incorrectly. If a logo is commercially important, do not approve the result without a close review.
4. Edges and occlusion
Inspect the areas where hands, hair, bags, or body parts overlap the clothing. Watch for merged fingers, broken sleeves, disappearing hems, and fabric that blends into the background.
5. Product proportions
Check whether the sleeve length, trouser length, waist position, and garment volume still make sense. The image should not imply a fundamentally different cut.
6. Channel crop
Preview the image in the ratio required by the final channel. A strong full-body result may lose the garment hem when cropped for a square product card.
If the image will also be submitted to a shopping feed, check the destination's requirements before publishing. Google Merchant Center's product image guidelines require the image to accurately show the product and recommend matching the correct color, pattern, and material variant.
Use the original product images as the reference source during approval. The AI model image adds presentation context; it should not become the only visual record of the product.
Build a Consistent Image Workflow Across Multiple SKUs
The first acceptable image is only the beginning. Ecommerce teams usually need several products to look like they belong to the same store.
Fix the model direction
Choose one or a small number of model directions for a collection. Reusing a compatible model style creates more continuity than selecting a completely different person for every SKU.
Keep framing and ratio stable
Decide whether the collection will use full-body, three-quarter, or upper-body framing. Keep the output ratio and product scale consistent where the channel allows it.
Group products by garment structure
Review tops together, bottoms together, and one-piece outfits together. Each group has different accuracy risks:
- tops require close checks around sleeves, neckline, and hands;
- bottoms require full visibility of the waist, legs, and hem;
- dresses and jumpsuits require the system to preserve the complete connected silhouette.
Use the same approval checklist
Do not approve one image for color, another for pose, and a third only because the model looks good. Apply the same product-accuracy checks to every SKU.
Keep versions traceable
Use clear file names that identify the SKU, model direction, ratio, and version. Keep the original garment image beside the approved result. This makes it easier for another team member to review the asset or replace it later.
For larger product image libraries, the GS1 Product Image Specification is a useful reference for consistent image naming and storage.
This is not automatic batch production. It is a repeatable operating method that helps a team create and approve AI model images more consistently.
Where Static On-Model Images Fit in Ecommerce
Product detail pages
Add an on-model image beside flat-lay photos, close-ups, and size information. It gives shoppers another visual reference without replacing the factual product assets.
Product listing and category pages
Use consistent model framing to make a collection easier to scan. Check that the garment remains large enough to understand at card size.
New-product launch preparation
Create an early visual direction while final campaign photography is still being planned. Teams can use it to align merchandising, content, and creative decisions.
Regional or audience exploration
Compare a small number of model directions when preparing content for different markets or brand audiences. Treat the result as a creative hypothesis, then review it against brand requirements.
Social and campaign layouts
Use approved images in product collages, launch posts, mood boards, or ad concepts. If the next task is to place the model or product in a different scene, use Hilight's Product Background workflow and follow the AI product background guide. Recheck the product after background removal, cropping, or additional image editing.
For more open-ended image creation, model assets, or ad-style compositions, see how GPT-Image 2 fits into Hilight's ecommerce visual workflow.
When Should You Use Photography or Video Instead?
Use conventional product photography when exact construction, fabric behavior, or color accuracy is central to the buying decision. Original photography should also remain the source of truth for size guides, fit-sensitive claims, labels, and fine material details.
Use the virtual try-on video tutorial when movement is part of the task. Walking, turning, fabric drape, and short-form video presentation require a different workflow from a static on-model image.
The formats can work together: original product photos establish factual detail, AI model images provide static presentation context, and try-on videos add motion.
Frequently Asked Questions
Can I create an AI fashion model image without a model photo?
Yes. Start with a model from Hilight's built-in model library. Upload a custom reference photo only when you need a more specific appearance or pose.
Can I upload only a shirt or only a pair of trousers?
Yes. In the tops-and-bottoms mode, you can upload one piece only. The other part of the model's original outfit can remain.
Can I put clothes on a photo of my own model with AI?
Yes, if the reference photo clearly shows one person in a suitable pose. The visible body area must cover the complete garment you want to present.
Why did the AI change the logo or print?
Small text, logos, and detailed patterns are difficult areas for image generation. Use a clearer source image, generate another candidate, and inspect the result at full size. Do not publish a distorted brand mark.
Is an AI model image a virtual fitting room?
No. It is a product-presentation image. It does not measure the shopper, recommend a size, or guarantee physical fit.
How many images should I generate for the first test?
Start with a small set. First confirm that the garment type, source image, and model are compatible. Produce more versions only after the product remains accurate.
Can the finished image be used in a video?
Yes. An approved on-model image can become source material for Hilight's Smart Video Creation workflow. Use the dedicated virtual try-on workflow when walking, turning, or garment motion is the primary output.
Final Thoughts
A polished AI model image may attract attention, but a faithful one is what makes it usable for ecommerce. Start with the correct garment structure, use a compatible model, and generate a small test before producing more versions.
Compare that test with the original product image. Once the garment, model direction, and framing pass review, reuse the same approval method across the rest of the collection.
Hilight Clothing Try-on gives teams a practical way to turn flat-lay product photos into static on-model visuals. The value comes from combining faster image creation with the same product discipline used to approve any customer-facing asset.

