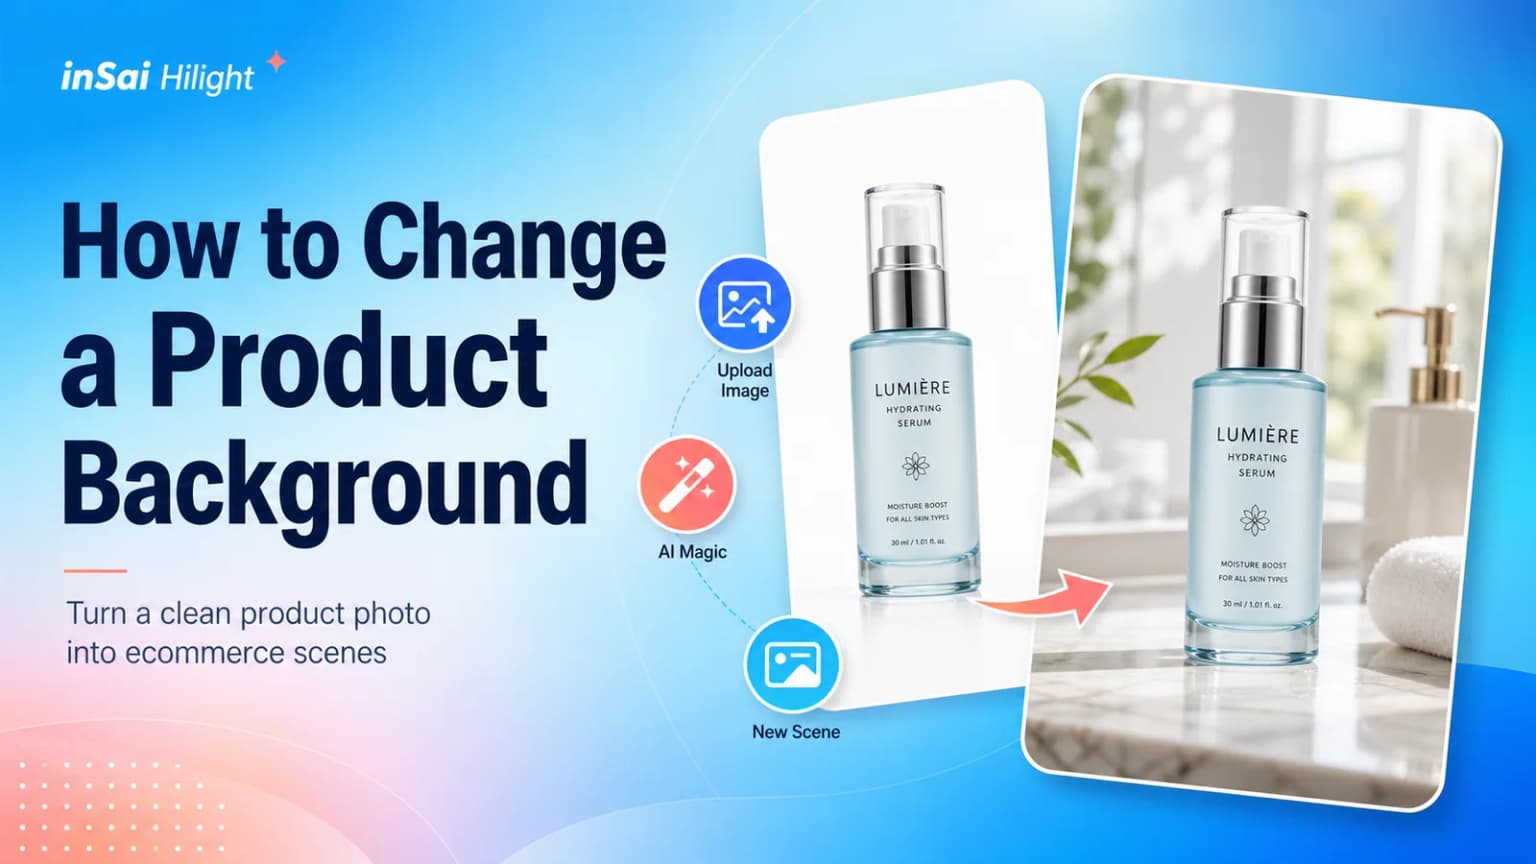
Quick Answer
Product Background Swap in inSai Hilight places a clear product photo into a new marketing scene for product pages, social posts, ads, or video assets. Open AI Studio, switch to Image Tools, upload the product photo, choose AI Generation, Reference Photo, or Creative Description, set the output ratio and image quantity, and select Generate Now.
When the results appear, compare the product with the source image before saving. Check its shape, color, packaging, text, logo, edges, and how naturally it sits in the new scene.
The same serum bottle may need a clean packshot on a product page, a bright bathroom counter in a routine-focused post, and a fresh seasonal setting in a campaign. The white-background photo is not the problem; one image is simply being asked to do several different jobs.
inSai Hilight is an AI content production platform for ecommerce and cross-border marketing. Its Product Background tool in AI Studio turns a clear product image into scene-based assets that can support product pages, social content, advertising, and marketing videos.
Start by deciding where the image will be used, then upload the product, choose a background method, and generate several versions. Before saving, compare each result with the original to make sure the packaging, color, and important product details remain recognizable.
Why One Product Photo Cannot Do Every Job
A white-background product photo answers a practical question: what exactly is the shopper buying? It keeps the packaging, color, shape, and details easy to inspect. A campaign image has a different job. It may need to show where the product belongs, create a seasonal mood, or leave room for a headline.
That difference matters. Replacing every white background would make a product page less informative, while using only packshots can leave social posts, advertisements, and video inserts without enough context. Product Background helps create scene-based assets while the original packshot stays available for checking product details.
Decide Where the Product Should Appear
Before opening the tool, decide where the finished image will be used. The placement should guide the scene rather than the other way around.
If the same product image will be used in several channels, define a separate scene direction for each one. A square social post, a product-page image, and a video insert do not need to share the same composition.
What Should You Prepare Before Starting?
The product image should be between 20 KB and 15 MB, larger than 400 × 400 pixels, and saved as JPG, JPEG, PNG, or WebP.
The product should be sharp, complete, and easy to distinguish from its current background. Avoid a blurred subject, visible noise, a cluttered setting, cropped edges, or unnecessary human limbs entering the frame.
If you plan to use Reference Photo, prepare a clear and recognizable background image as well. Avoid overexposed, blurry, low-quality, or visually crowded references.
How to Open Product Background in inSai Hilight
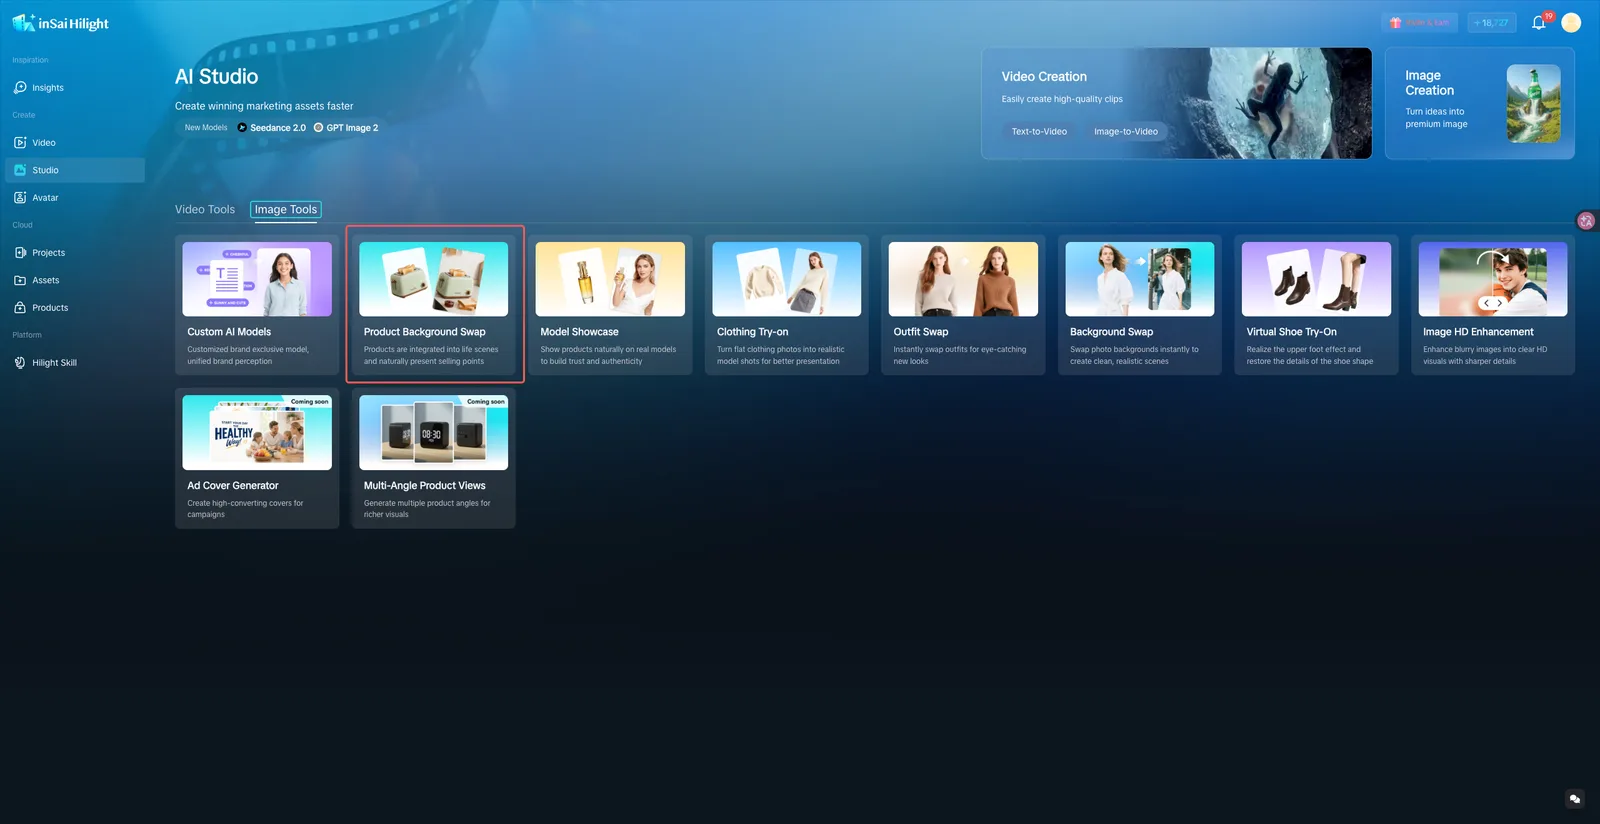
Sign in to inSai Hilight and enter AI Studio. Switch from Video Tools to Image Tools, then select Product Background Swap.
Use this entry when the source material is a product image and the goal is to place that product in a new scene. The other image tools on the page are designed for different tasks.
How to Change a Product Background Step by Step
Step 1: Upload the Product Image
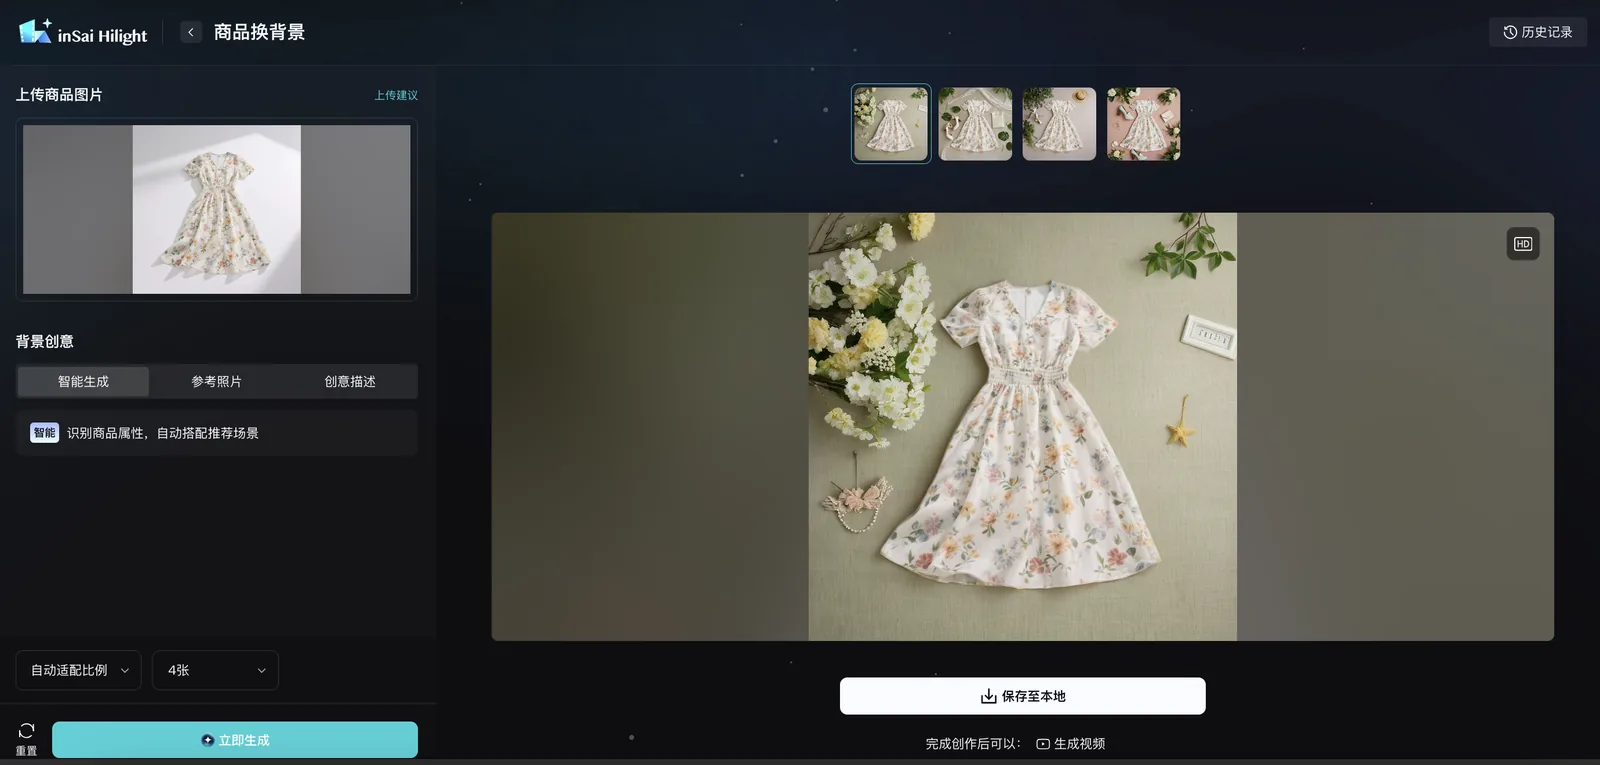
In the Upload Product Image area, click to choose a local file, drag an image into the page, or select an existing image from the asset library.
Review the preview before continuing. If the product is cropped, blurred, partly covered, or difficult to separate from the background, replace the source image first.
Step 2: Choose a Background Method
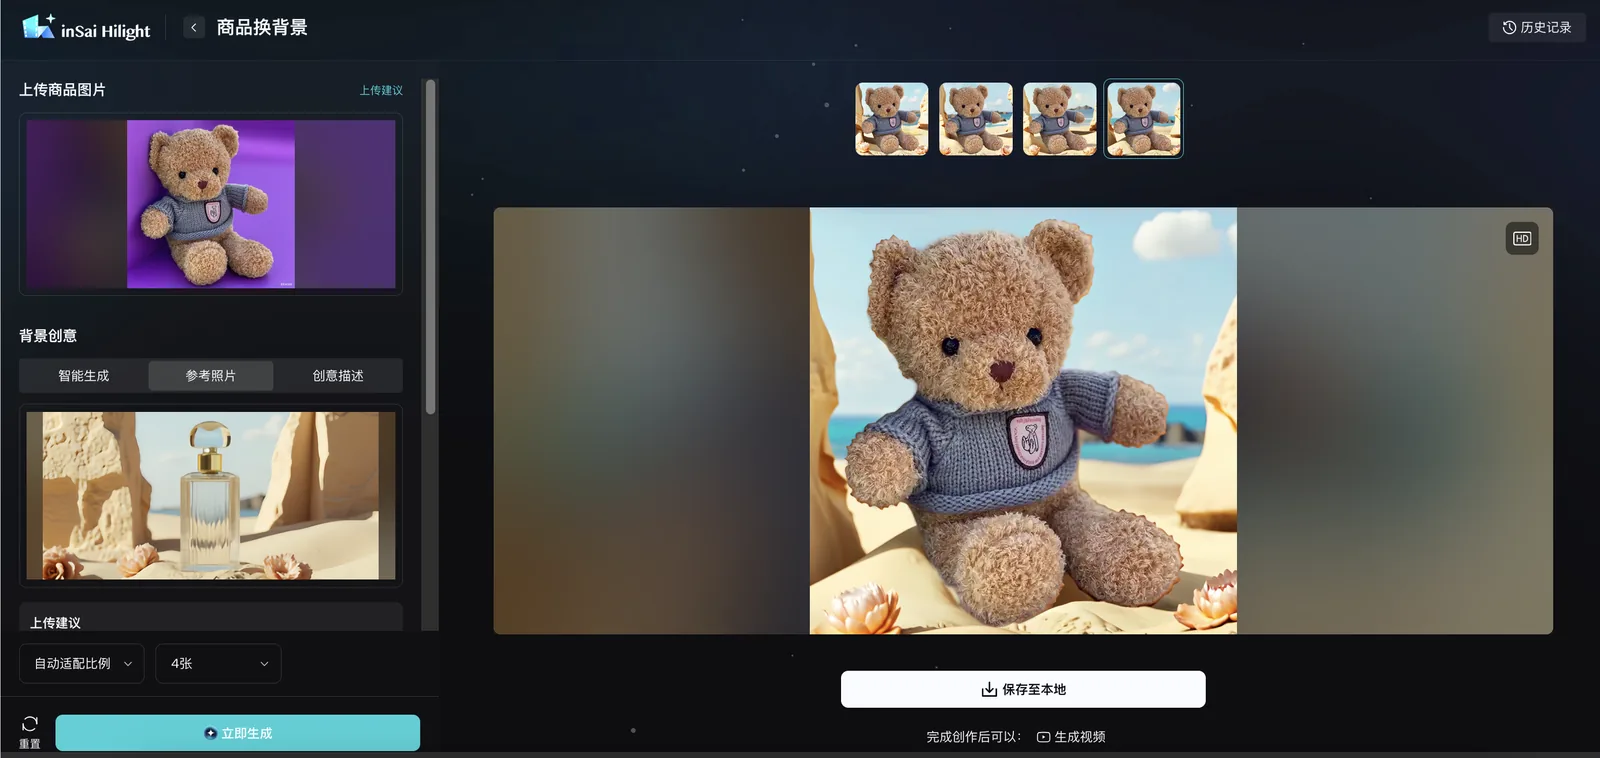
Product Background provides three ways to define the new scene:
- AI Generation: Use this when the product is clear but the visual direction is still open. Hilight identifies the product attributes and recommends a matching scene.
- Reference Photo: Use this when you already have a scene or campaign look to follow. Upload or select a clear background image for Hilight to reference.
- Creative Description: Use this when the scene can be explained in words. State the setting, style, and important elements, such as “spring garden, fresh style, cherry blossoms.”
For Creative Description, a specific direction is more useful than a broad request such as “a nice background.” The same principle applies to a reference image: it should communicate one clear environment instead of several competing ideas.
Step 3: Set the Output Ratio and Image Quantity
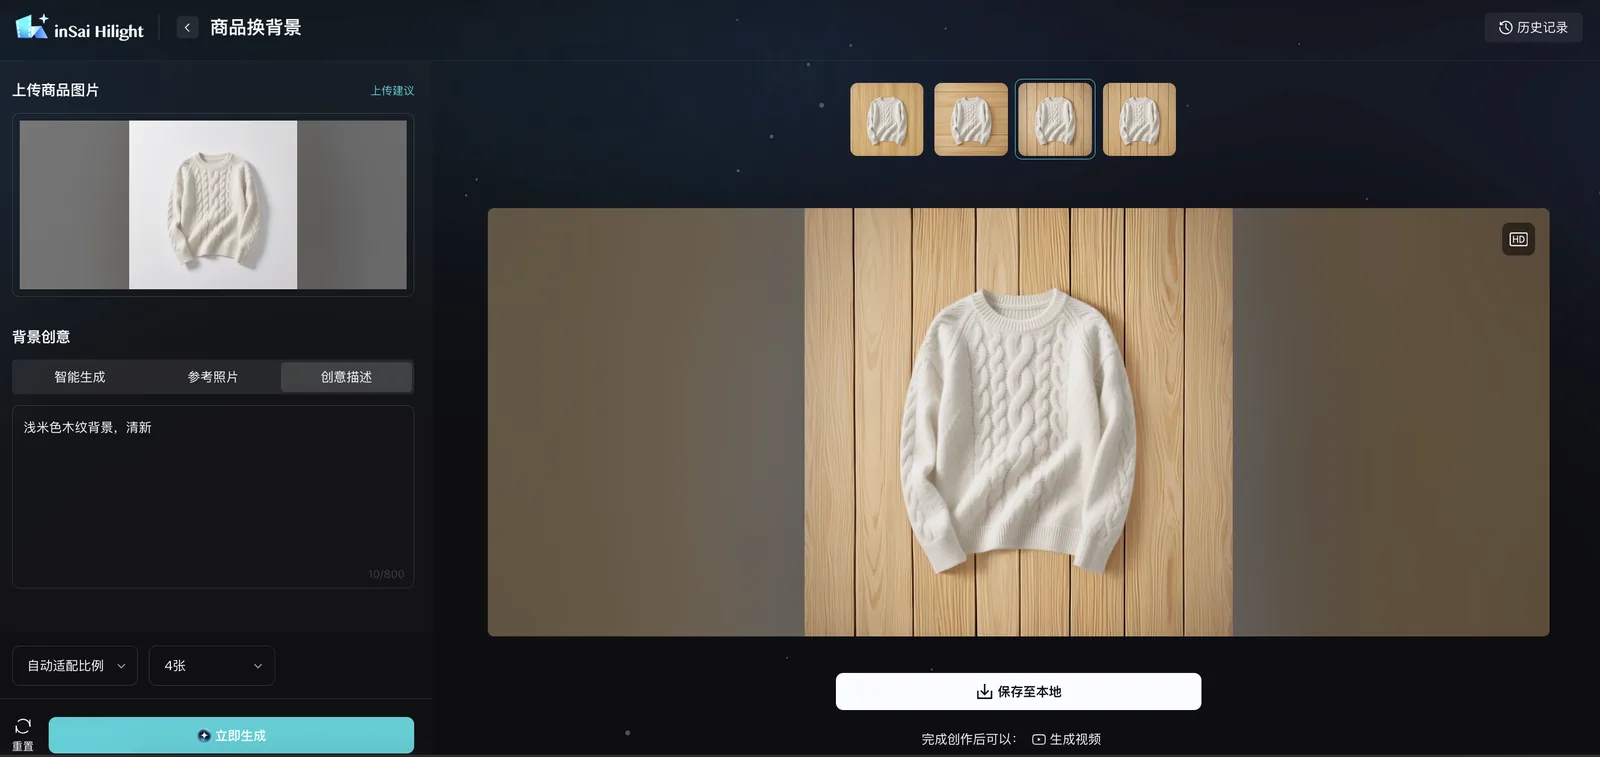
In the lower-left area, choose Auto-fit Ratio when you want the generated image to adapt to the product and background. Then select the number of images to generate.
Before generating, confirm that the correct product image and background method are still selected.
Step 4: Generate and Compare the Results
Select Generate Now and wait for the new images to appear in the result area on the right. Use the result thumbnails to compare the available versions.
Do not judge the background alone. Compare each result with the source product and check whether the shape, color, packaging, label, logo, reflections, shadows, and small functional details remain accurate.
Step 5: Save the Image or Review History
When a result is ready to use, select Save to Local. The saved image can support an ecommerce listing, social post, advertisement, or product-image section inside a marketing video.
To revisit an earlier generation, open History in the upper-right area. If you want to continue with the image, select Generate Video from the result area.
Example: Turn a Skincare Packshot into a Spring Campaign Image
Suppose you have a clear white-background photo of a serum bottle and need a spring campaign image for a social post. The product must remain accurate, but the new image should feel lighter and more seasonal.
If there is no campaign reference image, choose Creative Description and describe one focused direction, such as “light bathroom counter, natural morning light, fresh skincare style, clean background.” If the campaign already has an approved set or visual reference, choose Reference Photo instead. AI Generation is useful when you want to explore a suitable scene before committing to a direction.
After generation, compare the result with the packshot. Check the bottle proportions, pump head, label text, logo, liquid or glass transparency, color, and contact shadow. Also confirm that the background supports the skincare context and leaves enough room for the intended social crop. The background can change completely, but the serum bottle should still look like the same product.
How to Decide Whether the Result Is Ready
First view the image at a normal browsing size to judge the composition. Then enlarge it to inspect product details.
- Product accuracy: Does the item keep its real shape, color, packaging, and recognizable details?
- Edge quality: Do handles, straps, caps, fabric edges, and transparent areas blend naturally?
- Scene relevance: Does the new background make sense for the product and intended placement?
- Lighting match: Do the product and scene appear to share a believable light direction?
- Visual hierarchy: Is the product still the first thing the viewer notices?
- Channel fit: Does the ratio leave enough room for the intended listing, post, advertisement, or video crop?
Save a result only when both the product and the scene work. A more elaborate background is not useful if it makes the item look less accurate. If one version has the strongest atmosphere but another preserves the packaging more faithfully, the more accurate product image is the safer choice.
Four Product Background Problems and What to Change
Use a sharper source image with a complete, unobstructed outline. Avoid unnecessary limbs or objects around the item and a source background that blends into its edges.
Choose a clearer reference with fewer unrelated elements. The reference should communicate the environment and style without competing with the product.
Replace broad wording with a concrete setting, style, and one or two defining elements. For example, “fresh spring garden with cherry blossoms” is clearer than “beautiful outdoor background.”
Compare the packaging, label, logo, color, proportions, and small functional parts. Try a clearer source image or adjust the selected reference or description before generating again.
FAQ
Can I use Product Background without a reference photo?
Yes. Choose AI Generation to let Hilight recommend a scene, or use Creative Description to define the setting in words.
Which product image formats are supported?
Product Background supports JPG, JPEG, PNG, and WebP. The file should be between 20 KB and 15 MB and larger than 400 × 400 pixels.
Where can I find previous generations?
Open History in the upper-right area of Product Background to revisit earlier results.
Can the generated image be used in a product video?
Yes. After checking and saving the result, it can be used as supporting product imagery in a marketing video. You can also select Generate Video in the result area to continue with the image.
The Background Should Explain the Product, Not Compete with It
A useful product scene does more than look polished. It helps a shopper understand where the product belongs while keeping the item itself clear and recognizable. Start with the intended placement, then choose AI Generation, Reference Photo, or Creative Description according to how clearly the scene has already been defined. Compare the generated result with the original packshot before saving. The background can establish the campaign mood, but it should never make the product harder to identify.

